|
Gear door damage detail 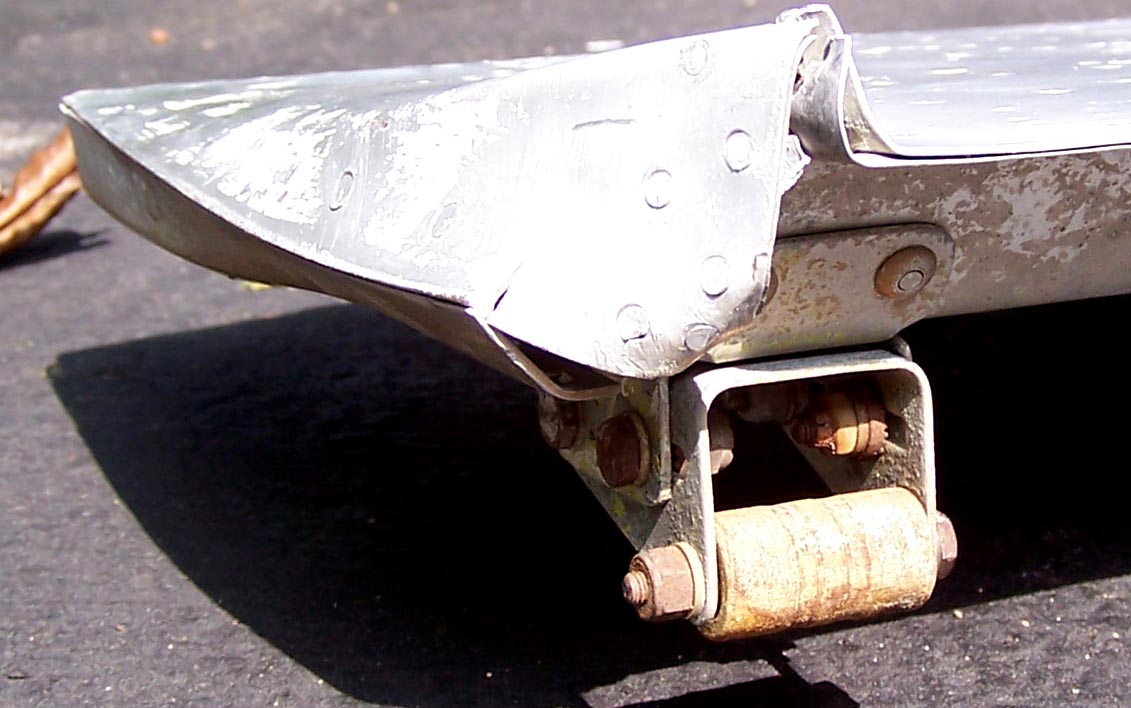 |
Cleaned bolts and nuts 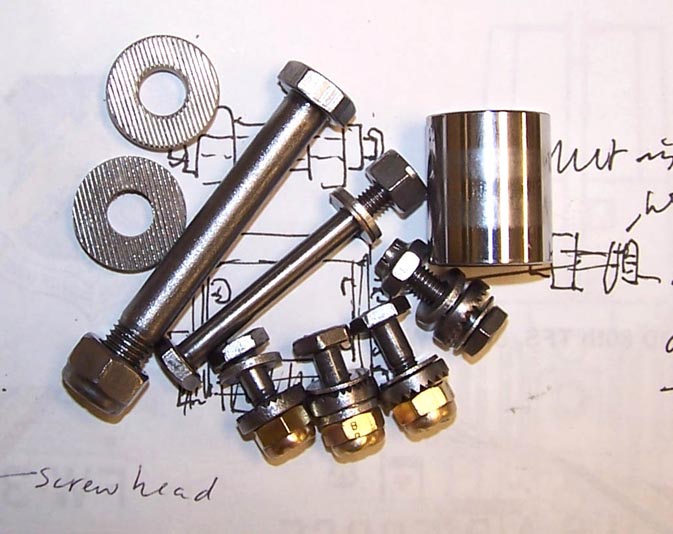 |
Completed gear door. 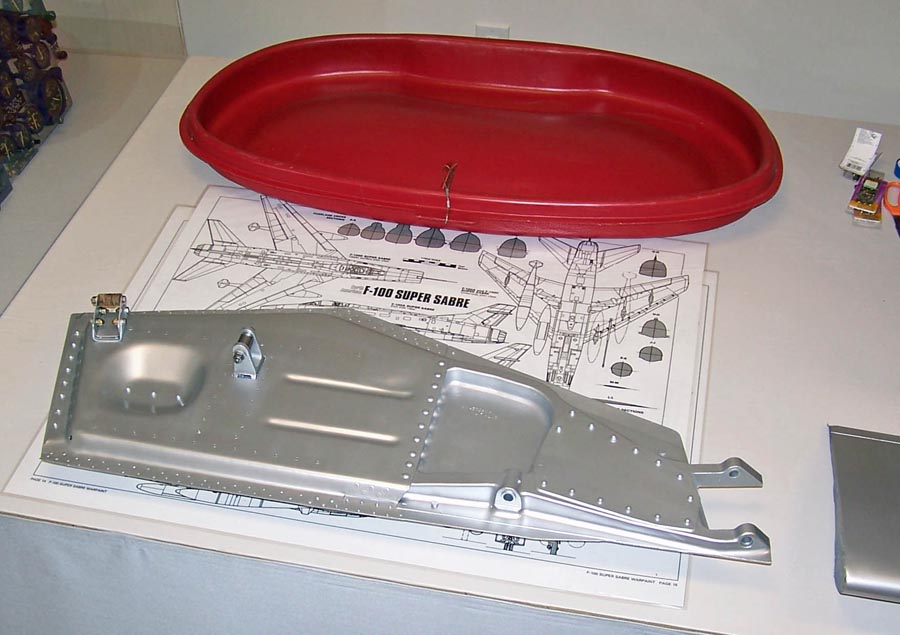 |
As you can tell by looking at Figure 1, cell 01, the right main gear door piece had seen better days when it arrived. Repairing the crumpled aluminum turned out to be impossible, so Steve Rettell performed some major deconstruction and used the pieces as templates for new aluminum skins.
Next, I removed all the gear door actuator brackets. The bracket bolts, nuts, and washers were rusted, so several hours were "invested" to remove the rust. Next, the cleaned bolts, nuts, and washers received some heavy-duty steel brush treatment -- love those high-speed drills and their attachments. Next, the steel rollers, nuts, bolts, and washers were polished. Finally, all the pieces were oiled to prevent the recurrence of rust and other oxidation. The results of six hours of work are shown in Figure 1, cell 02.
Note: You can enlarge the pictures by clicking on them. Click on the enlarged picture to make it even bigger and then maximize the window to get the best view ...
|
Gear door damage detail |
Cleaned bolts and nuts |
Completed gear door. |
After repairing the brackets and cleaning the bolts, nuts, and rollers, it was time to use "Bondo Magic" to fill seams and scratches to get the gear door ready for painting. Two coats of self-etching primer, sanding, more primer, and wet-sanding set the stage for the final two coats of aluminum lacquer.
Cell 03 in Figure 1 shows the inside of the completed gear door. The aluminum lacquer "look" matches that of the lacquer used by the Air Force in the late 50s. However, former F-100 Crew Chiefs -- who saw this picture before I put it on this web page -- tell me that aluminum lacquer tended to oxidize relatively quickly. Such oxidation left a much duller and somewhat darker-looking finish than the one you see in this picture. (Although wax might have preserved the shine, it appears that there weren't a lot of folks who enjoyed waxing airplanes ...) In any case, all my F-100 pieces will have the "just out of the paint shop" look, so oxidation is not an issue.
Comment by Brushface:
This is the outside gear door that was attached to the main gear with a rod. This
rod used the roller you see in the picture to pull the gear door shut when the
main gear was retracted. We had a lot of trouble with the up-lock not fully locking
the door in the "up" position. To cure that problem, we would take a grease pencil
and grease either the roller or the up-lock to see where it was hitting when the
gear retracted. After that was done, we could adjust the rod to make sure that the
door would lock properly. Every time you changed a tire you had to disconnect that
gear door -- a simple job of pulling a pin that locked when you pushed it in.
The intake cover you have in that cell 03 picture was added by the ANG. We had fabric intakes covers. The red intake cover was a lot simpler to attach and detach than those fabric covers. Incidentally, "Brushface" is my pen name and anybody who knows me will recognize that name.
As this major "modeling" project moves forward, I will post pictures of the progress we're making. I may not be able to have a real F-100 ... but a properly contructed full-scale model will not be distinguishable from the real thing. Stay tuned.
If you want to return to the home page, you can either click
on the
Home
link shown here or by
clicking on the
Home
link shown on the navigation bar on the left side of your screen.
(You can always use any of the navigation bar links to move around
this website.)