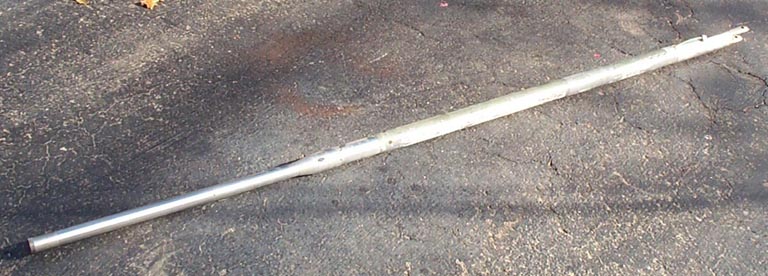
The pitot boom has been the easiest restoration to date. Figure 1 shows its condition after it was cleaned, but not yet stripped of its multiple paint layers.
Note: You can enlarge the pictures by clicking on them.
The pitot boom had an easily removed slight "bend" in it, so that was the first restoration job. I created a small cradle made with some sections of garden timber, wedged the contraption between two trees, clamped the bent section of the pitot boom into this home-made tool, and pulled sideways to straighten it. (Actually, I used a come-along to do the pulling ... Perhaps this fix was not very sophisticated, but it worked just fine.)
After the boom was straightened, I stripped the paint and did some initial polishing to make the scratches and other flaws stand out. Because the aluminum portion of the boom would be painted, I used a filler and then sanded and polished the filled areas until they were smooth. The stainless steel portions were another matter ... it took over 15 hours of sanding and polishing to restore the stainless steel surface to a "like new" condition.
After the pitot boom had been polished sufficiently, the aluminum portion was painted with a self-etching paint. When this base coat was dry, it was carefully sanded with very fine sandpaper. After that job was done, two light coats of white lacquer were sprayed on. After the white laquer was properly cured, I taped the boom in preparation for painting the red bands. Figure 2 shows the boom after the taping was completed. (I used blue tape and black plastic to cover the areas that were supposed to remain white.)
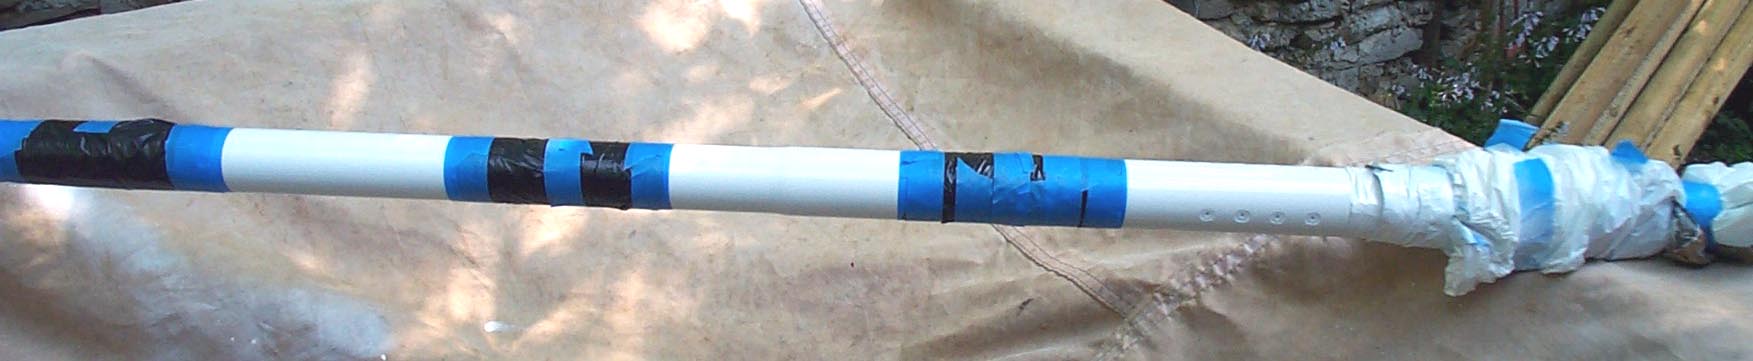
Figure 3 shows the boom after the red paint has been sprayed on and Figure 4 shows the completed pitot boom, ready for installation in the F-100 Building. (You can see it displayed by clicking on the F-100 Building link and scrolling down to Figure 9 on that page. The boom is anchored to the back wall.)

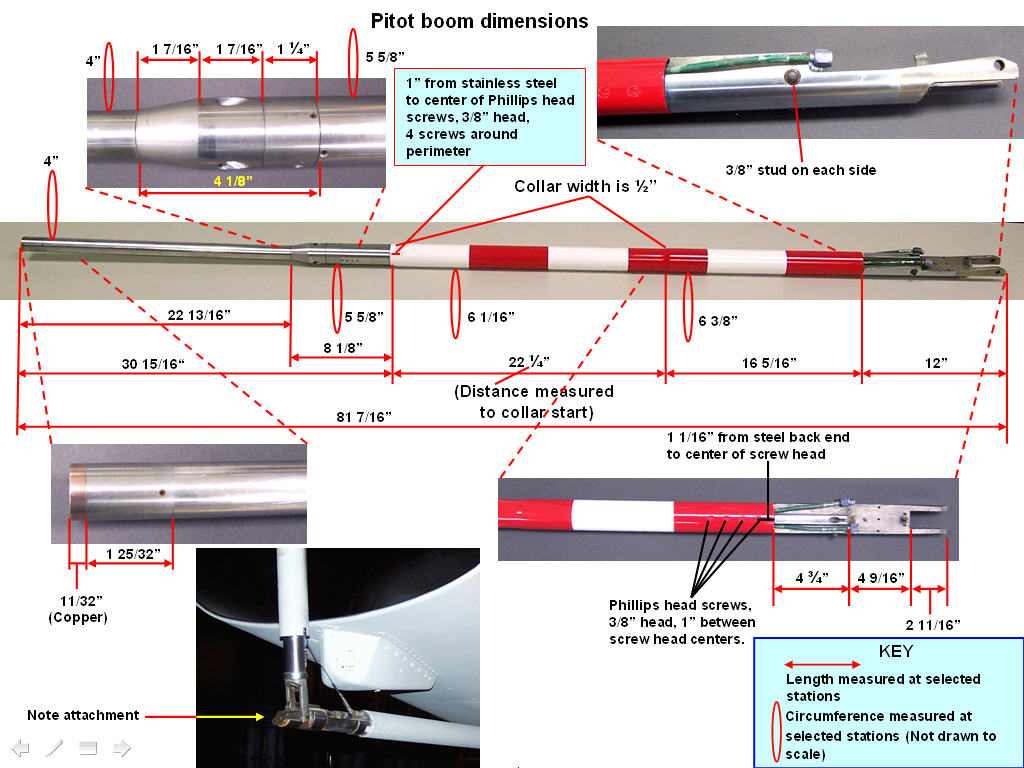
If you are a serious aircraft modeler, please note that Figure 5 shows a few of the pitot boom's details and measurements. (I used a PowerPoint slide to produce this picture and then made a screen capture of the slide in slide show mode. You may find this technique useful when you want to document your own modeling work.)
While the rebuilding and restoring efforts are important, please remember that the main focus of the F-100 project is its database. If you can supply stories and pictures that reflect your experience with the Hun, please do so. (You can click on the Contact me link to send me an email.) The objective is to develop a very comprehensive personal history of the Hun and of the people who flew and maintained her. You and the Hun deserve to be remembered in your own words.
If you want to return to the home page, you can either click
on the
Home
link shown here or by
clicking on the
Home
link shown on the navigation bar on the left side of your screen.
(You can always use any of the navigation bar links to move around
this website.)